What makes a monoprint different?
A monoprint is an image transferred from a prepared surface onto paper. Unlike a carved printing block, the arrangement of ink can change each time you print. You might repeat a shape or use the same surface again, but each impression will have its own marks and variations. That unpredictability is part of the appeal.
You do not need a press to try it. Hand pressure can transfer a thin layer of ink from a smooth surface to paper. Start with one colour and a small image so you can see how changes in ink, pressure and paper affect the result. Think of the first few prints as experiments rather than finished artworks.
Gather materials and prepare your space
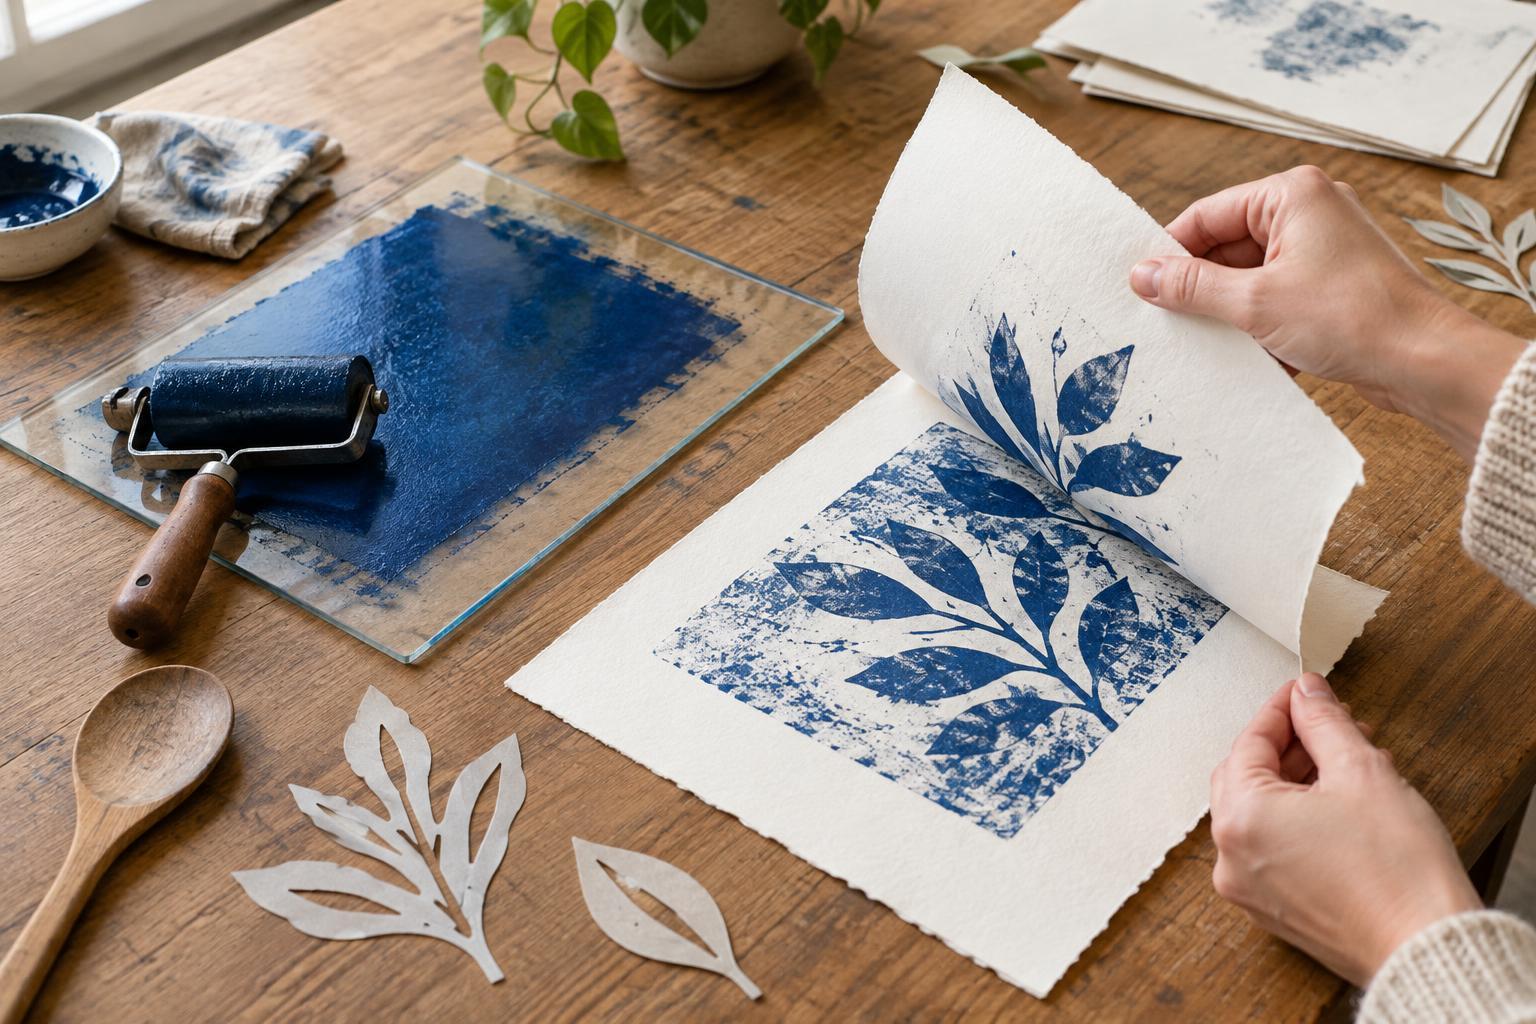
You will need a smooth, nonporous printing surface, such as a reusable plastic sheet or a gel printing plate; water-based block-printing ink; a brayer or small foam roller; plain paper; and scrap paper for protecting your table. A spoon with a smooth back can help you apply pressure. For mark-making, set out a cotton swab, a piece of cardboard or another blunt tool. Choose ink and materials labelled for the way you intend to use them, and follow their cleanup instructions.
Work on a covered surface away from food preparation. Keep a damp cloth nearby, and wear clothes you do not mind staining. Cut your printing paper a little smaller than the printing surface, or leave enough room around it to lift it cleanly. Ordinary drawing paper is fine for a first attempt; if it is very thick or heavily textured, transferring the ink evenly by hand may take more effort.
Roll, draw and pull your first print
Place a small amount of ink on the printing surface and roll it into a thin, even layer. It should cover the surface without forming ridges or puddles. If the roller slides through a thick patch, spread the ink farther or remove some. A thin layer makes drawn marks easier to see and is less likely to blur under the paper.
Use a cotton swab or the edge of a piece of cardboard to remove ink and draw a simple image. Try broad curves, a few lines or a cluster of shapes. The areas where you remove ink will print lighter. Keep in mind that the image will reverse when transferred: lettering and directional shapes need particular care.
Lay your paper onto the inked surface in one motion, then hold it steady. Rub across the back with your palm or the smooth back of a spoon, paying attention to the edges. Use firm, even pressure without dragging the sheet. Lift one corner to check the transfer; if the paper has not shifted, you can lower it and rub again. Peel the sheet away carefully and place it flat to dry.
Explore stencils, textures and second impressions
Once you understand the basic transfer, try laying a simple paper stencil onto the ink before placing your printing paper. The stencil blocks ink and leaves a lighter shape. A leaf can also create an interesting silhouette, though its thickness may prevent ink from reaching the paper evenly around its edges. Try one new element at a time so you can tell what produced each effect.
There may be enough ink left on the surface for a second, paler impression, sometimes called a ghost print. Pull it onto a fresh sheet before cleaning or adding more ink. You can also let a first print dry, then print another colour over it. Slight shifts between layers can create lively edges; if you want more precise alignment, mark where the corners of your paper sit on the scrap sheet beneath your work.
Adjust the result and clean up
If a print looks patchy, try rubbing more evenly or using a smoother, thinner sheet of paper. If details disappear into a dark mass, use less ink or make wider marks. Blurred edges can mean the ink is too thick, the paper moved during rubbing or too much pressure was applied in one place. Change one thing on the next attempt rather than trying to correct everything at once.
Allow prints to dry before stacking them; drying time depends on the ink, paper and thickness of the transfer. Clean the surface and tools according to the ink maker’s directions. Save a few imperfect impressions, too. Comparing them with later prints is a useful way to learn how your hands, materials and choices shape an image.