Start with a simple value plan
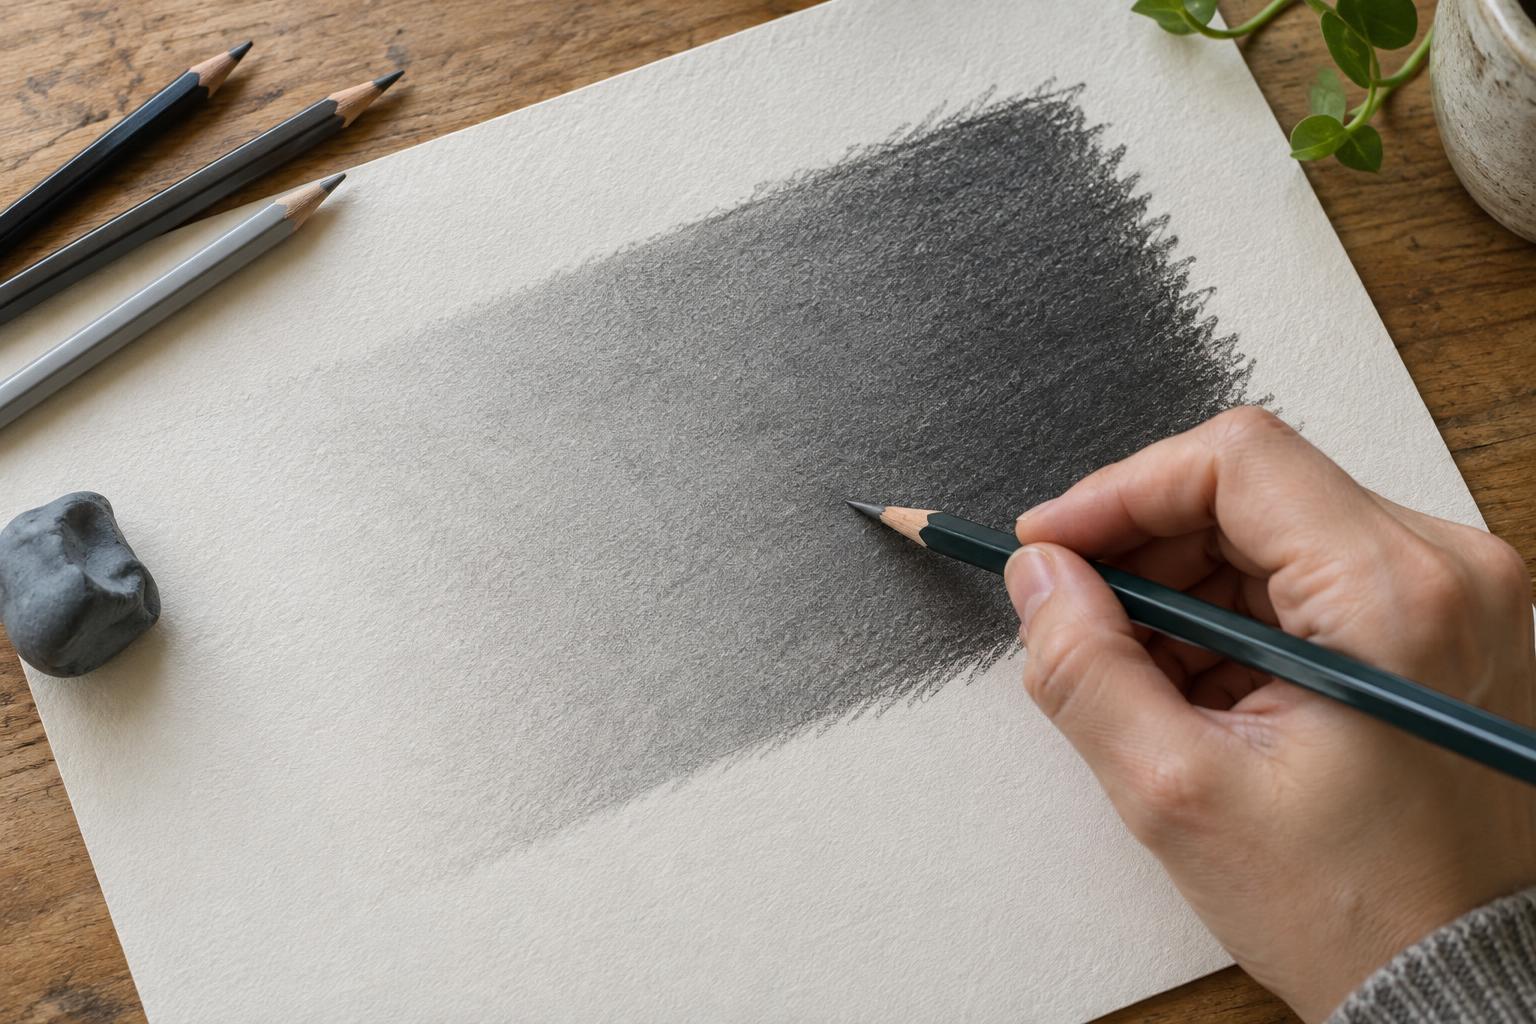
A smooth gradient is easier to draw when you know where it is going. Before shading a sphere, folded cloth or another subject, identify its lightest area, darkest area and a few tones in between. Look for broad shapes of light and shadow rather than trying to copy every small change. If you are practicing without a subject, draw a long rectangle and plan a gradual shift from white at one end to dark gray at the other.
Keep the lightest area mostly free of graphite. A clean highlight is usually easier to preserve than to recover later with an eraser. Lightly mark the edges of any shadow shapes, then check that those marks will not remain visible in the finished drawing. A faint outline can guide you; a heavy one may become an unwanted border.
Choose paper and pencils that work together
Ordinary drawing paper with a little texture gives graphite something to hold on to. Very smooth paper can make subtle marks easier to see, while rougher paper may leave more visible white specks between graphite marks. Neither is automatically better: try a small gradient on your chosen sheet before committing to a larger drawing.
One pencil is enough to practice, but a small range can make value changes easier to manage. An H or HB pencil is useful for pale layers; a softer B pencil can help develop darker tones. Pencil grades vary by maker, so judge them by the marks they make on your paper. Keep the point reasonably sharp for control, or use the side of the lead for broader coverage. Place a clean sheet beneath your drawing hand if you tend to smudge the surface.
Build middle tones with light, overlapping layers
Begin at the light end with barely visible marks. Move the pencil in short, overlapping strokes, keeping your hand relaxed. As you work toward the dark end, add more passes rather than making one forceful pass. Each layer should change the value a little. This gives you chances to correct an uneven area before it becomes too dark.
Try changing the direction of your strokes between layers. For example, lay down gentle diagonal marks, then cross them with marks angled the other way. The aim is not to press a pattern into the page but to fill small gaps gradually. You can also use small circular movements if they feel easier to control. Whichever motion you choose, let neighboring tones overlap. An abrupt stop at the edge of each pass can create stripes instead of a gradual transition.
Pause often and view the drawing from farther away. Up close, individual pencil marks can dominate your attention; at a distance, it is easier to judge whether the overall shift from light to dark feels even.
Deepen the darks without flattening the drawing
Once the pale and middle values are established, strengthen the darkest area in stages. A softer pencil can add depth without requiring as much pressure as a harder pencil. Work gradually and compare the dark end with the rest of the gradient after each layer. If it becomes very dark too soon, the middle tones may seem compressed into a narrow band.
Avoid pressing so hard that the paper becomes shiny or slick. Heavy pressure can flatten its texture, making later layers difficult to control. If the surface stops taking graphite evenly, further pressure is unlikely to make the transition smoother. Instead, spend time refining the tones just beside the darkest area. A convincing gradient depends as much on those neighboring values as it does on the dark itself.
Refine transitions and practice deliberately
If you spot a visible step between two values, shade lightly across both sides of it rather than filling only the lighter side. A clean kneaded eraser can lift a little graphite from an area that has become too dark; dab gently instead of rubbing. Blending tools can soften pencil marks, but they may also spread graphite into highlights. Try them on a separate sample first, and remember that careful layering can create a smooth result without any blending tool.
For a useful exercise, draw three rectangles. Shade the first using one pencil, the second using two pencil grades and the third using whichever method felt most controlled. Keep the light and dark ends in the same places, then compare the transitions. You may find that your smoothest result comes not from a particular pencil, but from lighter pressure, more patient layering or a clearer plan for the values between white and dark gray.