Start with a design that suits the block
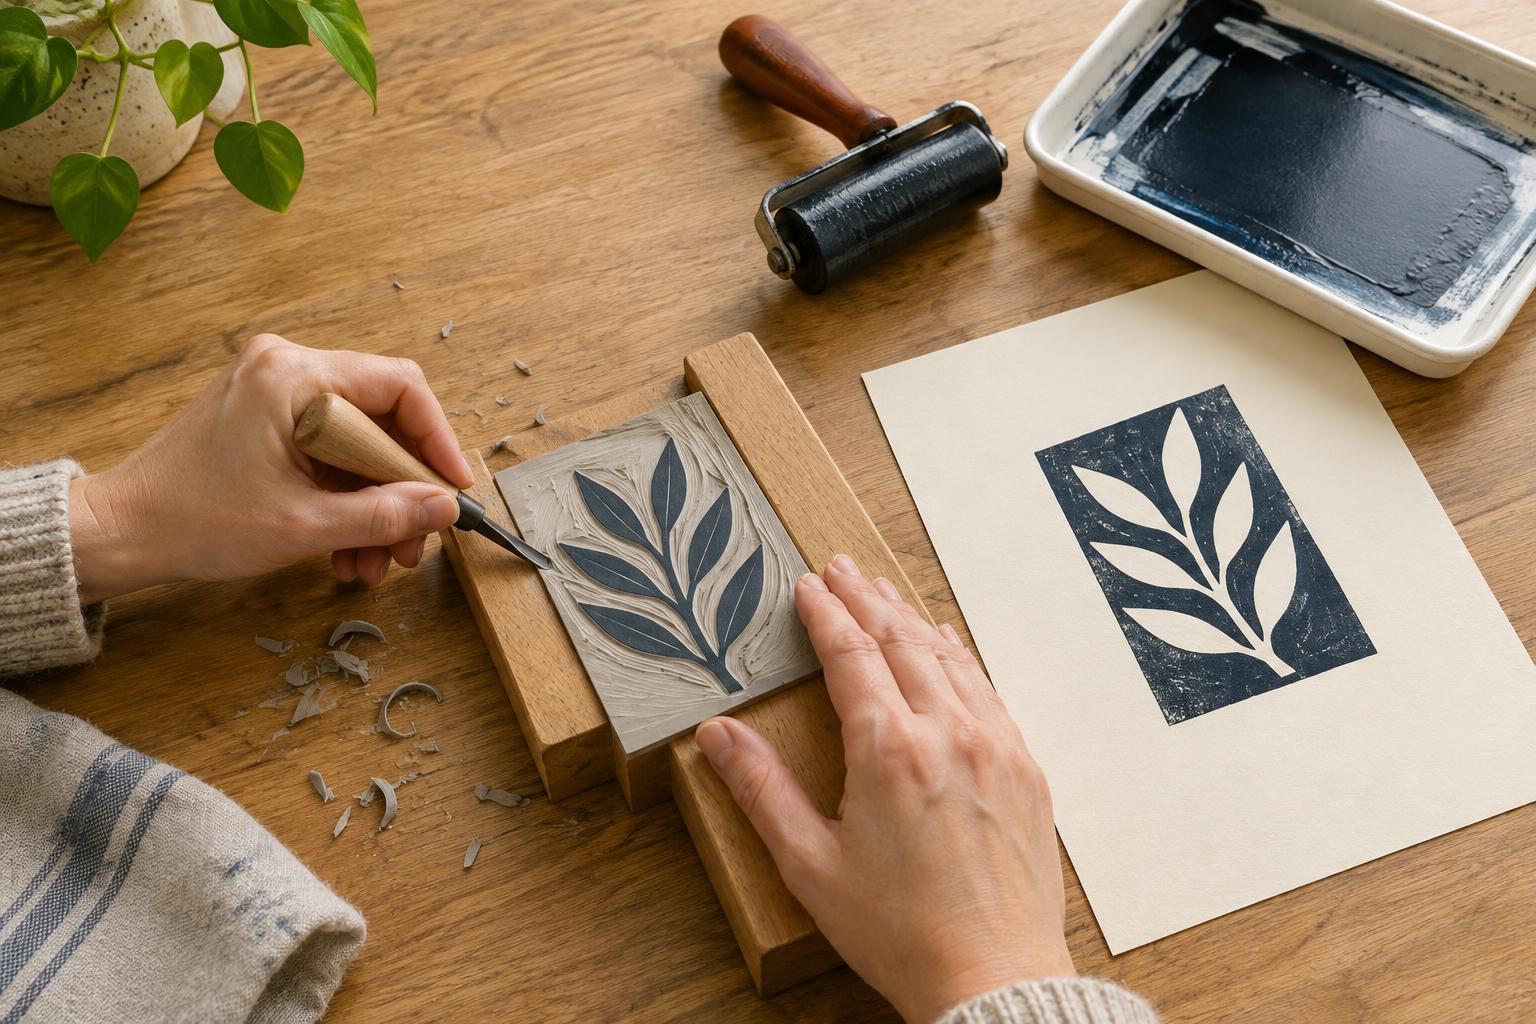
Linocut is a form of relief printing: ink sits on the uncarved surface of a block, while the areas you cut away usually remain the color of the paper. You can make a first print without a press, using a small piece of carving lino, a roller and hand pressure. A leaf, fruit, simple building or abstract shape is a good place to begin.
Choose a design with bold shapes and generous spaces between details. Thin lines and tiny gaps can be difficult to carve and may fill with ink when printed. Sketch your idea at the size of the block, then decide which parts should print and which should stay blank. Mark the areas you plan to remove so you do not have to make that decision while holding a carving tool.
A print comes off the block in reverse. This may not matter for an abstract shape, but it matters for letters, numbers and recognizable asymmetrical objects. If direction is important, reverse the drawing before transferring it to the block. A light pencil drawing may be enough for a simple design; follow the block maker’s guidance if you use transfer paper or another marking method.
Prepare a steady, uncluttered workspace
Gather a carving block, a suitable lino-cutting tool, paper, block-printing ink, a roller and a smooth surface for rolling out ink. A spoon can help apply pressure when printing by hand. Keep scrap paper nearby for tests and a cloth or paper towels for cleanup. If you are new to carving, a small block is easier to manage than a large sheet.
Work at a table with good light and enough room to turn the block. Place it against a bench hook or another firm stop so it cannot slide. Keep your free hand behind the cutting edge, never in the path of the tool. Cut away from your body, use controlled strokes and turn the block instead of twisting your wrist to follow a curve. A cut-resistant glove may add protection, but it does not replace careful hand placement. Fit and change blades according to the tool maker’s instructions.
Carve slowly, from broad areas to small details
Before cutting the design, try a few strokes on an offcut or an area you intend to remove. This helps you learn how deeply the tool cuts and how much force it needs. Shallow, repeated cuts are easier to control than forcing a blade through the surface. If a cut catches, stop and reposition the block rather than pushing harder.
Begin with the larger background areas, leaving the shapes you want to print raised. Remove enough material that the roller is unlikely to touch those areas, but do not worry about making the entire surface perfectly flat. Work toward finer details only after the main shapes are clear. Check the block often: a line removed by mistake cannot simply be put back. Small stray marks can also become part of the image, giving a hand-carved print some of its character.
Brush loose pieces away with a cloth or brush, not your fingers near the blade. Put the carving tool down before inspecting the block closely or moving your hands across it. Taking short breaks can help you notice awkward hand positions before they lead to a slip.
Ink the block and make a first print
Put a small amount of block-printing ink on a smooth tray or sheet made for inking. Roll it into a thin, even layer, then roll gently across the raised surface of the block. You want coverage without thick ridges of ink. Too much ink may spread into carved lines; too little can leave patchy shapes. A test print will tell you more than the inked block alone.
Lay paper carefully over the inked block and hold it still. Rub the back with your palm or the rounded back of a spoon, working across the whole design with steady pressure. Lift one corner to check the impression while keeping the rest of the paper in place. If it looks incomplete, lower the corner and rub that area again. Peel the paper away slowly and set it somewhere clean to dry, following the ink maker’s guidance.
Look at the test print before carving anything else. Unexpected white gaps may come from uneven pressure or too little ink, while filled-in details may mean you used too much. If a background patch prints by accident, you can carve it lower before trying again. Make one change at a time so you can see what improves the result.
Clean up and keep experimenting
Clean the block, roller and inking surface according to the ink and tool makers’ instructions. Water-based ink is often convenient for beginners, but its cleanup still depends on the product. Keep blades covered or stored safely when you finish, and allow prints to dry before stacking them.
For your next print, try changing the paper, ink color or placement of the block. Even with one carved design, these choices can alter the mood of the image. Keep your first proof alongside later prints: it is a useful record of how small adjustments in carving, inking and pressure change what appears on the page.