What makes alla prima different?
Alla prima means building a painting while the paint is still wet, rather than waiting for one layer to dry before adding the next. It is sometimes called wet-on-wet painting. The method invites you to make decisions about shape, color and edges as the picture develops. You can often move a brushmark, blend two neighboring colors or wipe back an area without starting over.
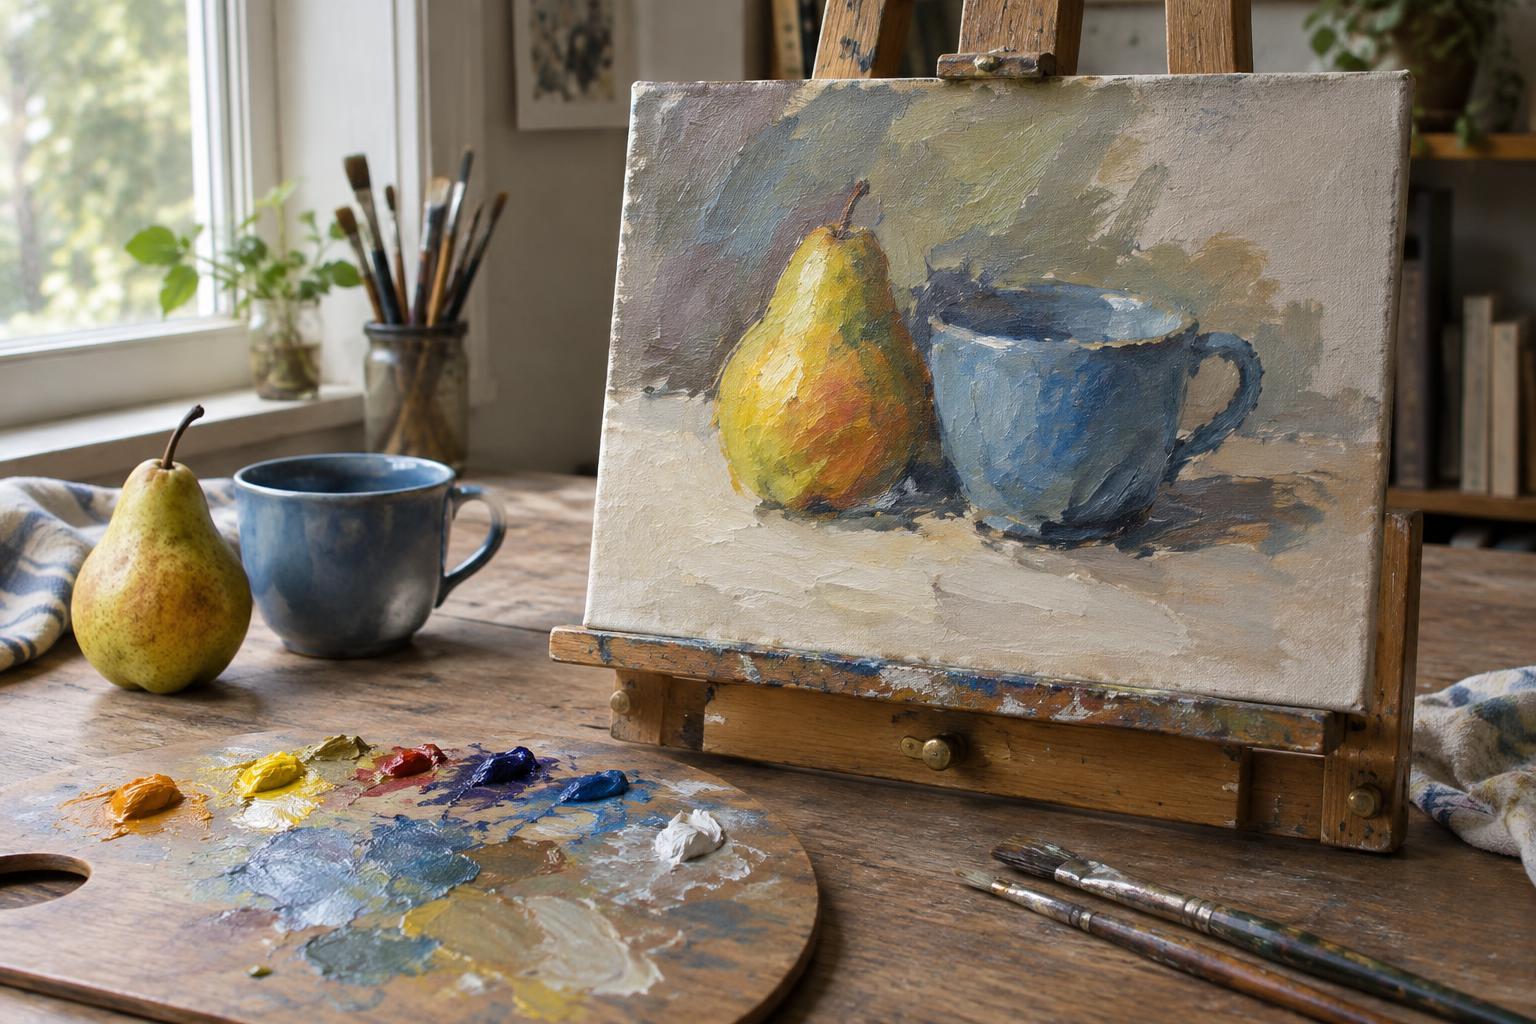
An alla prima painting does not have to be finished in a single sitting. Oil paint may remain workable beyond that, depending on the colors, thickness and conditions. The useful distinction is that you are working into wet paint. For a first attempt, choose a modest subject: one piece of fruit, a cup or a small view through a window. A limited subject gives you room to explore the paint without having to solve too many visual problems at once.
Set up for clear decisions
Use a canvas or panel prepared for oil paint, a small selection of oil colors, a palette, brushes and a cloth or paper towels for wiping. Keep a separate brush for light mixtures if you can. A limited palette makes it easier to see how colors relate: try a light color, a dark color and a few colors suited to your subject. You can add others later if you find a clear need for them.
Place the subject where its light and shadow shapes are easy to distinguish. Before touching the surface, decide where the main object will sit and what background shape will surround it. A quick sketch or a few small thumbnail drawings can help you choose a composition. Aim for an arrangement you can describe in simple shapes rather than a collection of tiny details.
You can paint without solvent by wiping brushes thoroughly between colors and using paint from the tube. If you use a medium or solvent, follow its label and work with appropriate ventilation. Keep paint away from food and drink, wash your hands after painting and handle used paint, towels and cleaning materials according to their product guidance.
Build the picture from large shapes
Start by marking the broad placement of the subject. A small amount of paint spread thinly can establish the outline and the major division between light and shadow. Then cover the largest areas with approximate colors. At this stage, ask whether the picture reads from a short distance. If the cup looks like a cup before its handle or reflections are added, the main shapes are doing their job.
Pay particular attention to value: how light or dark each area appears. Squinting at your subject can make small details less noticeable and help you compare its larger light and dark masses. Mix a few useful piles of paint before working into the surface, including a shadow color, a middle value and a lighter mixture. They need not be perfect; they give you a starting point for comparison.
Work from broad brushmarks toward smaller ones, while leaving some early marks visible. If the shape is wrong, adjust its boundary before adding detail. You can paint across an edge, lift paint with a clean cloth or scrape a small area back with a palette knife. In wet paint, changing your mind is a normal part of building the image.
Keep wet color and edges under control
Wet colors mix wherever they meet. That can create a gentle transition, but repeated brushing can turn distinct mixtures into an indistinct patch. To keep a color clear, wipe the brush, load it with enough fresh paint and place the stroke deliberately. If an area becomes difficult to read, remove some paint and restate the shapes instead of adding another layer to everything beneath it.
Edges offer another way to direct attention. A firm edge can make an object stand out; a softer edge can let it settle into the surrounding space. Try sharpening one or two boundaries near the point of interest and allowing quieter boundaries elsewhere. To soften an edge, pass a relatively clean brush lightly between the adjoining wet colors. Stop as soon as the transition says what you want it to say.
Texture works best when it supports the subject. A visible stroke might describe the curve of a fruit or the direction of folds in fabric. Thicker paint can catch light and draw the eye, so consider saving it for a few selected passages rather than applying it uniformly.
Know when to stop and what to try next
Pause regularly and look at the painting from across the room. Ask whether the large shapes still make sense, whether the lightest and darkest areas are where you intended, and whether any busy detail distracts from the subject. You do not need to resolve every edge. A painting can feel complete when its main relationships are clear, even if some passages remain open and expressive.
For your next study, paint the same simple subject twice. In the first version, concentrate on light and dark shapes; in the second, concentrate on edges. Keeping the subject familiar makes it easier to notice what each choice changes. Alla prima becomes more approachable when you treat each painting as a chance to make a few clear decisions while the paint is still willing to move.